| 1 | (1) 개발 세팅의 기본 - APM(Apache+PHP+mariaDB) |
| 2 | (2) 개발 세팅의 기본 - PHP 설치 |
| 3 | (3) 개발 세팅의 기본 - PHP에서 mariaDB 커넥션 테스트 |
기본 중에 기본이며 "수학의 정석"과도 같은
APM은 10년도 훌쩍 넘은 시간 가운데 아직도 굳건하게 자리하고 있다
시스템 설정은 자주 하는 것이 아니며 설정이 단번에 성공하면
오직 1번만 하는 것이기에 항상 기억이 가물가물하다
아주 오래전 기억 이후에 재설치를 할때면 이렇듯 늘 새롭다(^^)
APM은 제목에도 있듯이
Apache
PHP
MariaDB (예전에는 MySQL 이었죠)
마리아디비는 이미 다른 카테고리에서 4편에 걸쳐서 설명하기에 거기서 참조하면 되고
여기서는 A 와 P 만 하려고 합니다
이제 Apache 시대도 저물어 지금은 nginX가 대세이지만
추억의 아파치를 다시 설치하려고 합니다
(정식적인 과정에 대한 readme 문서를 먼저 보고 진행하겠습니다.)
Install -------
You must first install the Visual C++ Redistributable for Visual Studio 2015-2019 x64. Download and Install, if you have not done so already,
see: https://www.apachelounge.com/download/
Unzip the Apache24 folder to c:/Apache24 (that is the ServerRoot in the config). The default folder for your your webpages is DocumentRoot "c:/Apache24/htdocs"
When you unzip to an other location: change Define SRVROOT "c:/Apache24" in httpd.conf, for example to "E:/Apache24"
Run and test ------------ Open a command prompt window and cd to the c:\Apache24\bin folder. To Start Apache in the command prompt type:
>httpd.exe
Press Enter. If there are any errors it will tell you. Warnings will not stop Apache from working, they do need to be addressed none the less. If there are no errors the cursor will sit and blink on the next line.
You can test your installation by opening up your Browser and typing in the address:
http://localhost
You can shut down Apache by pressing Ctrl+C (It may take a few seconds)
To install as a service. Open command prompt as Administrator and type:
>httpd.exe -k install
You can start/stop the service with the command:
>services.msc
To see all Command line options:
>httpd -h
ApacheMonitor:
Double click ApacheMonitor.exe, or put it in your Startup folder.
Apache 다운로드 (https://www.apachelounge.com/download/)
그것과 호환을 위한 필수 프로그램인 Visual Studio 도 미리 설치해보자
(You must first install the Visual C++ Redistributable for Visual Studio 2015-2019 x64.)

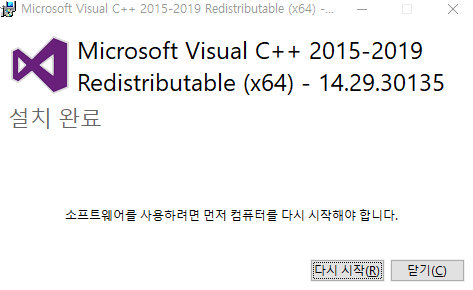
먼저 VS 부터 설치해보자 (다운받은 VC_redist.x64.exe 을 실행한다)

설치가 끝나간다

그런데 ㅠ ... 여기서 임시저장해야 겠네요
컴퓨터 재부팅 중....
이제 아파치 웹서버를 윈도우10에 설치해 보자
zip 압축 파일을 풀면 작업이 끝납니다.


이 폴더를 내가 원하는 위치에 두고 사용하면 됩니다
저는 C드라이브 루트에 복사합니다
이제 기억이 나지요?
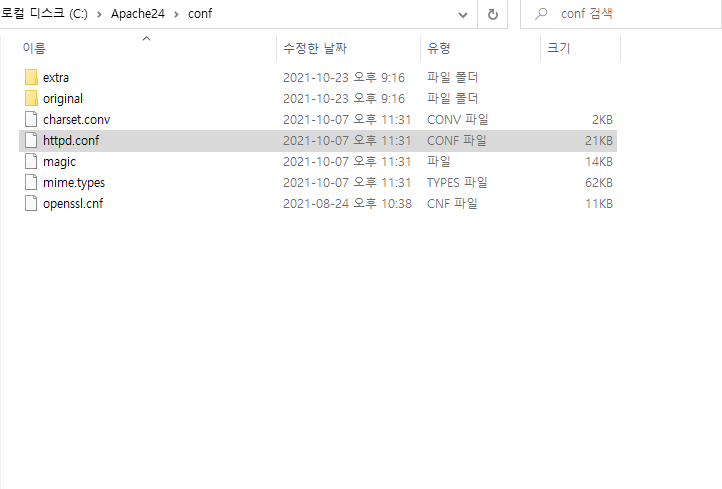
/conf 디렉토리에서 httpd.conf 파일을 수정하겠습니다

참고로
파일 에디팅(editing,편집 등) 은 VSC (visual studio code)를 추천드립니다
https://code.visualstudio.com/
Visual Studio Code - Code Editing. Redefined
Visual Studio Code is a code editor redefined and optimized for building and debugging modern web and cloud applications. Visual Studio Code is free and available on your favorite platform - Linux, macOS, and Windows.
code.visualstudio.com
또는 sublime text 도 그럭저럭 사용할만 합니다
Download - Sublime Text
Sublime Text 4 has been released, and contains significant improvements over this version. Sublime Text may be downloaded and evaluated for free, however a license must be purchased for continued use. There is currently no enforced time limit for the evalu
www.sublimetext.com
파일을 열어보니
설정할 부분이 있습니다
(1) 서버루트 설정

Define SRVROOT "c:/Apache24"
이미 바뀌어 있는 경로와 동일합니다
(2) 리스닝포트 변경

리스닝 포트도 수정을 원하면
80 포트 대신 숫자를 적어준다 (웬만하면 그대로 사용하자)
(3) DocumentRoot 설정 (index.html 파일등이 존재하는 곳)

다음은 Document Root 경로 확인입니다
아까 정의된 문장으로
Define SRVROOT "c:/Apache24"
ServerRoot "${SRVROOT}" 이므로
${SRVROOT}/htdocs 란 의미는 c:/Apache24/htdocs 이므로 맞네요
패스~
(4) 서버네임 변경
서버네임은 브라우져에서 http://localhost 라는 것이 호출되도록 변경하는 것입니다

ServerName 앞에 주석을 풀고
ServerName localhost:80 또는 ServerName 127.0.0.1:80 으로 변경해 줍니다.
저는 아래와 같이 변경합니다
ServerName 127.0.0.1:80
저는 해당 서비스를 윈도우서비스에 등록하지 않고 수동으로
필요할 때만 호출해서 사용하는 방법으로 하겠습니다
(5) 디렉토리 인덱스 (시작하는 index 파일 설정)
(기존)
<IfModule dir_module>
    DirectoryIndex index.html
</IfModule>
(변경 index.php 추가)
<IfModule dir_module>
    DirectoryIndex index.html index.htm index.php
</IfModule>
이것은 특정 도메인명(localhost나 직접 ip 호출이나)을 호출시
명시적으로 index.html 이나 index.php 또는 index.jsp 등의 개발언어의 홈 index 파일을 타이핑 치고 들어가지 않아도 되게 하는 설정입니다. 즉
- localhost = localhost/index.html
- localhost = localhost/index.php
- localhost = localhost/index.jsp
모두 아래와 같이 동일하게 호출하면 해당 개발된 페이지로 실행됩니다.
엄밀히 말하면 포트 80까지 합하면 아래와 같은 의미인 것이죠
localhost = localhost:80/index.html
아무튼 브라우져엣 URL만 쳐도 해당 index 페이지로 가게 하려면 웹서버 DirectoryIndex에 추가해 주어야 해요

C:\Apache24\bin 에서 도스커맨드 창으로 관리자 권한으로 실행
그리고 해당 경로로 이동합니다.

진행 중에 에러는 무시해도 된다고 하네요 (Errors reported here must be corrected before the service can be started)

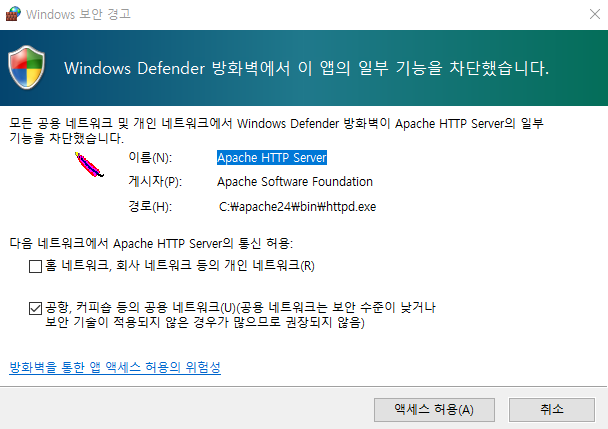
그런 후에 실제로 아파치 웹서버를 실행해 보겠습니다

설치도 잘되고 실행도 잘 된거 같습니다
윈도우 서비스에서 보겠습니다

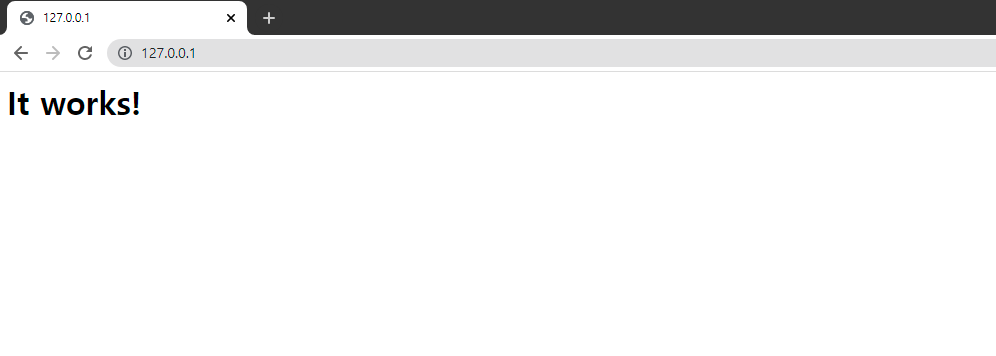
자 그럼 실재로 browser에서 화룡점정의 마음으로 실행해 보겠습니다
아네 좀 썰렁하네요 예전에 아파치 깃털이라도 보였는데 말이죠

참고로 영상으로도 확인해보세요
다음편에서는 PHP로 연동해서 보여드리겠습니다
'테크노트 > APM' 카테고리의 다른 글
| 개발세팅의 기본 - PHP에서 mariaDB 커넥션 테스트 (0) | 2021.10.23 |
|---|---|
| 개발 세팅의 기본 - PHP 설치 (0) | 2021.10.23 |


댓글